
It’s a no-brainer. Your business NEEDS to be on Facebook. You’re missing out on some serious marketing potential and exposure if the only reason you’re using Facebook is to stay in touch with friends you’ll never meet, or to stalk that ex girl / boyfriend of yours you wish you never cheated on(!) The first stop for you as a business owner should be to create a Facebook page. This is easy enough and is really the most basic step to your career as a Facebook marketing genius, but how can we get our pages standing out from the millions of other pages? Que the ‘Welcome’ tab.
Facebook allowed integration and development of applications using it’s own version of HTML called FBML. It was great for a time and developers flocked to understanding and mastering it, only to find out early 2011 that Facebook had decided to pull the plug on it and that all webmasters and Page Admins should revert their FBML tags and code BACK to HTML. Bit of a silly merry-go-round but, ya know, it’s not as if we have a say in what Zuckers and Co decides to do. This resulted in a cartload of information on the internet referring to FBML which is now defunct, useless, space-sucking, call it what-you-want. So, I’ll reveal the most up-to-date way of achieving it, using an iframe tab and HTML.
Dedicated landing pages are used to steer your page visitors to a single image or page. This page can be used to further promote your brand, product or service, remind your visitors to ‘Like’ your page and anything and including therafter, dependent on your coding skills. Most pages go straight to the wall or photo albums, which is boring because it’s the default view, so this little tweak will make your page shine out amongst the cannon-fodder(!)
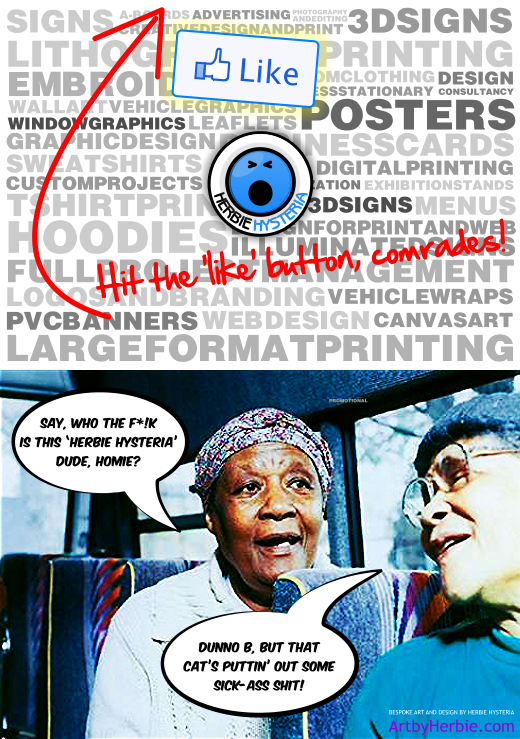
I just changed mine, here’s what all non-fans and first-time visitors see:

A little reminder for all non-fans and new visitors...
Then, to all the wonderful homies who ‘Like’ my page:

...then a little 'Thanks!' for all those who 'liked' my page.
Yeah, yeah, I know. You may be thinking ‘that design is f****ing awesome, ha ha ha, Herbie you are just too sick!’, but ya know, don’t wanna blow my own trumpet and all that but, yeah, I knocked the images up in a few minutes whilst juggling eight tennis balls, lickin’ a Cornetto ice-cream and balancing on my head – all at the same time. Who says it’s only women who can multi-task?
See, Dick? It’s pretty simple but a very slick trick(!) Here’s how you do it:
1) Install ‘Static HTML’ App on Your Page
You need the ‘Static HTML: iFrame Tabs’ app for your page. Go to https://www.facebook.com/apps/application.php?id=190322544333196 and click the ‘Add to my page’ link which can be found on the bottom left of the application’s page.
2) Create and Upload Images
This is important. The width of your images can only be 520px. This will ensure you use all the allocated space whilst keeping everything flush and neatly positioned. The height can be anything you want. My images above are 739px in height. Export your images as gifs, pngs or jpegs. Use 96dpi pngs for optimum web performance and appearance.
Save your image(s) in your own web directories or by using the many free image-hosting services available such as Flickr and Photobucket. Make sure you know the full directory paths to your image(s).
3) Enter App Code
Click the new ‘Welcome’ tab you see on your page after you have installed the app. You can decide here if you just want one image to show everyone, or two images to show non-fans and fans alike. Be slick like me and go for the double-combo meat-fist sandwich (ie. two images). Enter the following code into the boxes:
<style type='text/css'>

#wrapper {

width:520px;

height:739px;

margin:0 auto; border:0; padding:0;

position:relative;

}

</style>

<div id="wrapper">

  <div style='width:520px;'>

    <img src='YOUR IMAGE URL HERE' /> <!-- This image will be displayed to non-fans -->

     <!-- You can also add any HTML that you want displayed to non-fans -->

 </div>

</div>
Make sure you enter the correct image dimensions in the code and also the url to where you saved your images. Repeat this step in the second box if you wish to show a different image for users who have already ‘liked’ your page. Click ‘Save and view tab’ at the top right corner and view your new welcome page in both forms, as a non-fan and also as a fan.
As a final check, go to your page> Edit Info> Manage Permissions and ensure the ‘Default Landing Tab’ is selected to ‘Welcome’. Get your Facebook rudies to check your new welcome tab and report back. Everything should be working smooooth!
Here’s what mine looks like on my page:

'Live and kicking'
4) Become Overwhelmed With The Flood Of New Fans(!)
That’s it! Now your page stands out from everyone else’s and reaches a new-level in the ‘slickness chart’. Notice all the big boys and pros have already had this sussed. Welcome to the ‘Player’s Club’ homie! My page received a humongous SIX new likes within the 24 hours since I created my new Welcome tab, and I salute each one of my new fans. I have an earth-shattering 102 likes on my page now and I’m proud because each one of these people actually acknowledged my shizzle by clicking the ‘like’ button.
Now, to everyone else who HASN’T liked my page, what the f….??!! Us bloggers share secrets, tips and tricks for the benefit of others who may not have the skills we do. The LEAST you can do is ‘like’ my Facebook page here….jheeeeze!
Till the nex’ time, kids!
PS: You can comment using your FB profile below, without having to enter email address etc. Let me know what you think.